
When it comes to baking, my specialty is definitely cupcakes. To frost my cupcakes when I'm using a buttercream or cream cheese frosting, I will usually just cut a disposable pastry bag at the tip to make a wide opening and I make a swirl on the cupcake. It's just a simple, pretty way to top a cupcake.
My friend's mother has become an extremely talented cake decorator. I walk into their house and the kitchen is covered in fondant flowers and buckets of frosting. I became inspired to try more advanced techniques because people go nuts for that kind of stuff.
I LOVE shopping. Mainly for clothes and shoes and bags and makeup and jewelry...BUT shopping for baking supplies is just as fun! So I hit up the nearby Michael's and found some new frosting tips. Let me tell you, the amount of frosting tips is pretty overwhelming and they all start to look the same. So here's a little buying guide, how-to, and a demo of each of the tips. P.S. There are TONS of decorating tutorials on YouTube if you need more visual instructions :)


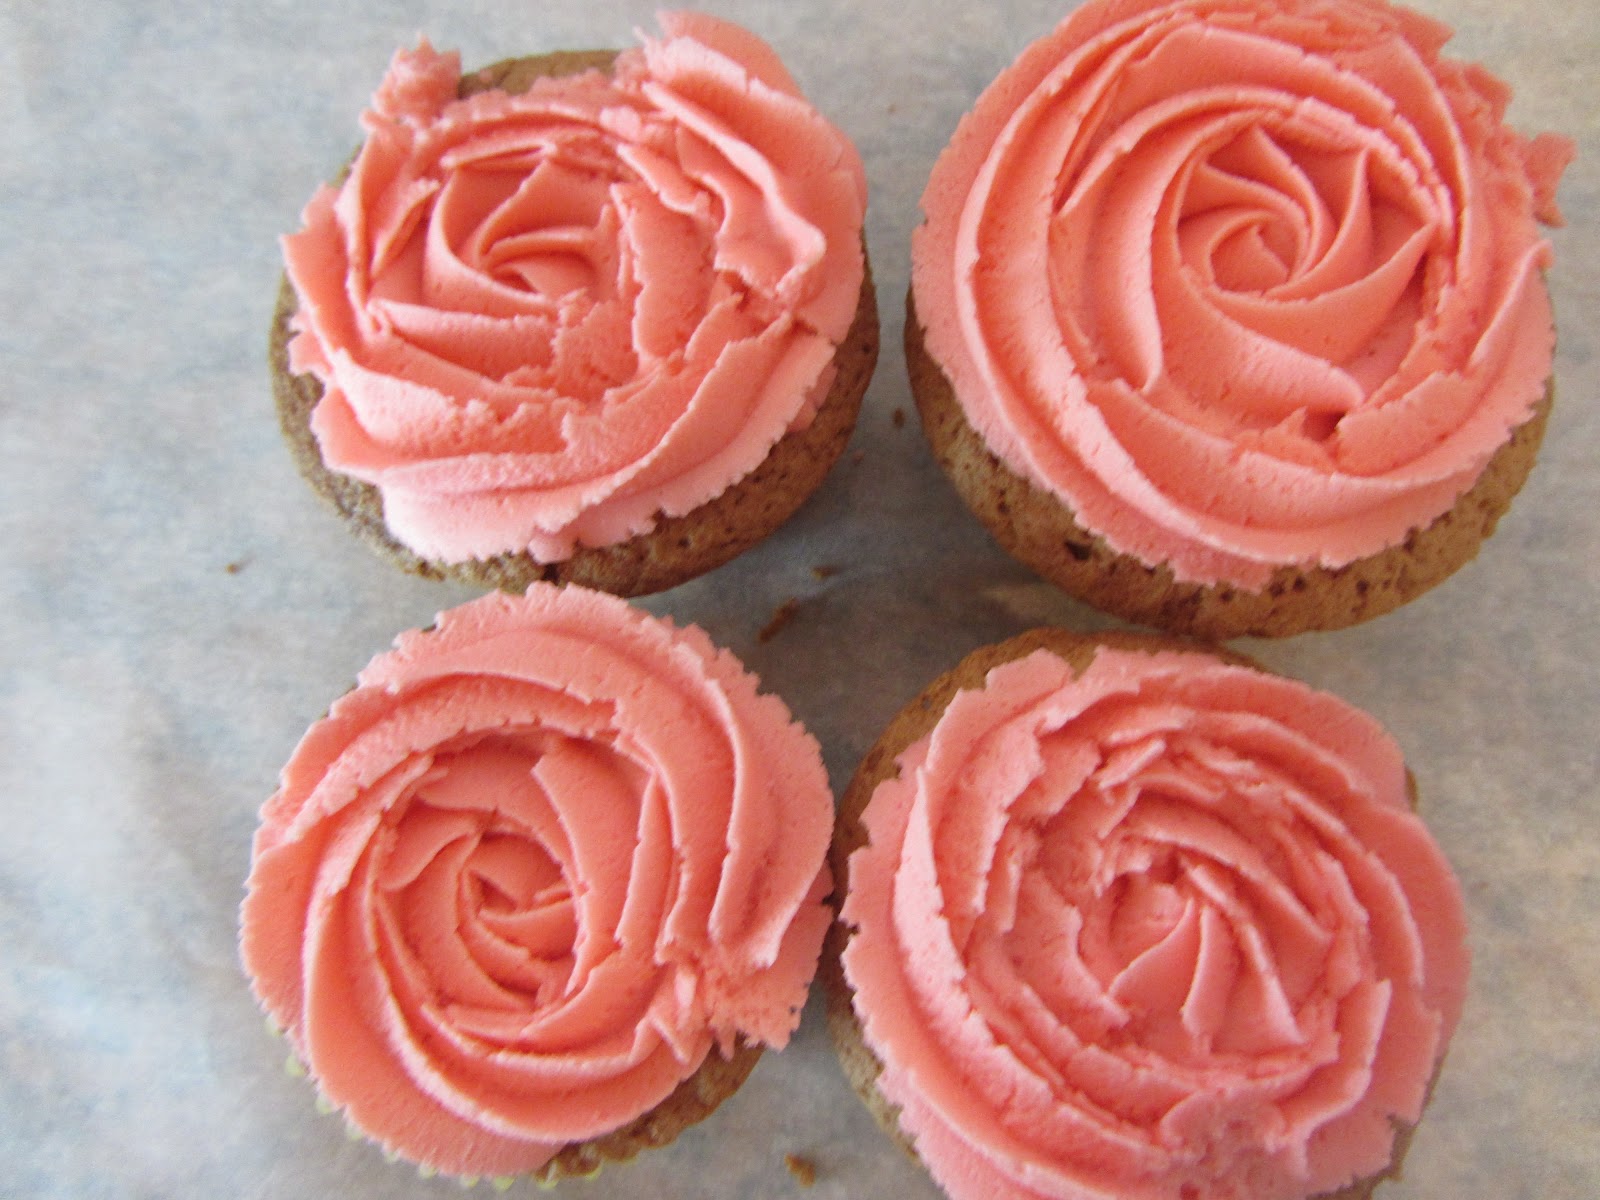
How-to (swirl 1): Using the 1M tip, pipe a border around only the outer edge of the cupcake. Stop pressure and pull the tip away. Pipe a second spiral in the center of the cupcake and pull away at the top of the spiral.
How -to (swirl 2): Using the 1M tip, pipe a border around only the outer edge of the cupcake. Stop pressure and pull the tip away. Position the piping bag about 1/4'' above the center of the cupcake, and press down with light pressure to create a star in the center.
How-to (swirl 3): Hold piping bag about 1/4'' above center and put pressure until the cupcake is almost completely covered. Stop applying pressure slightly and lift up a little, then twist the bag slightly and put more pressure to create a second layer. Then do this one more time, twisting again, on top of the second layer.
Rosettes: Start from the center, and continue going around the cupcake. Each ring of frosting should slightly overlap the previous one. Finish on the outside edge.
#4B: The 4B tip is an open star tip. It can create stars (big surprise), shell borders, and a basket weave.

Shell Border: Holding the icing bag parallel to the surface, apply moderate pressure to create a small bulb of frosting. Gently, decrease pressure and pull away from the bulb. Without pulling away, create another bulb of frosting almost overlapping the previous bulb. Continue until finished with border.
Star: Apply pressure and release.
Basket Weave: A lot of people use a flatter tip for a basket weave, but the 4B works for a thicker weave. First, make a vertical line with the frosting. Over the line, create 3 (or more) short, horizontal lines (like the stitching on a football). Draw another vertical line, parallel to the first, about a centimeter away from the first. In the empty space in between the two vertical lines, start one of the short horizontal lines for the second line. The horizontal line should go from the gap to the other side of the second vertical line. Repeat.
#12 Round Tip - great for outline, lettering, dots, balls and beads (which looks great as borders)
I have been looking for a really really REALLY big round tip. However, this was the biggest I could find. It won't make swirls as well as a larger tip would, but it does make some other useful designs and borders.


Shell Border: Holding the icing bag parallel to the surface, apply moderate pressure to create a small bulb of frosting. Gently, decrease pressure and pull away from the bulb. Without pulling away, create another bulb of frosting almost overlapping the previous bulb. Continue until finished with border.
Star: Apply pressure and release.
Basket Weave: A lot of people use a flatter tip for a basket weave, but the 4B works for a thicker weave. First, make a vertical line with the frosting. Over the line, create 3 (or more) short, horizontal lines (like the stitching on a football). Draw another vertical line, parallel to the first, about a centimeter away from the first. In the empty space in between the two vertical lines, start one of the short horizontal lines for the second line. The horizontal line should go from the gap to the other side of the second vertical line. Repeat.
#12 Round Tip - great for outline, lettering, dots, balls and beads (which looks great as borders)
I have been looking for a really really REALLY big round tip. However, this was the biggest I could find. It won't make swirls as well as a larger tip would, but it does make some other useful designs and borders.

Dots: Position icing bag right on top of surface, apply pressure, release.
Beading: (see shell border)
#104 Petal Tip - flower petals, ruffles, ribbon, and bows.
I bought this tip to start practicing with roses and bows. That was a complete failure and I'm going to have to leave those to the experts because they're a whole lot harder than they look. I was able to make some ruffles with the tip, which also look impressive as borders.

Ruffle: Make the wider end of the 104 tip lightly touch the surface, with the narrower end raised. Apply even pressure as you move the bag up and down, moving across the surface.


